
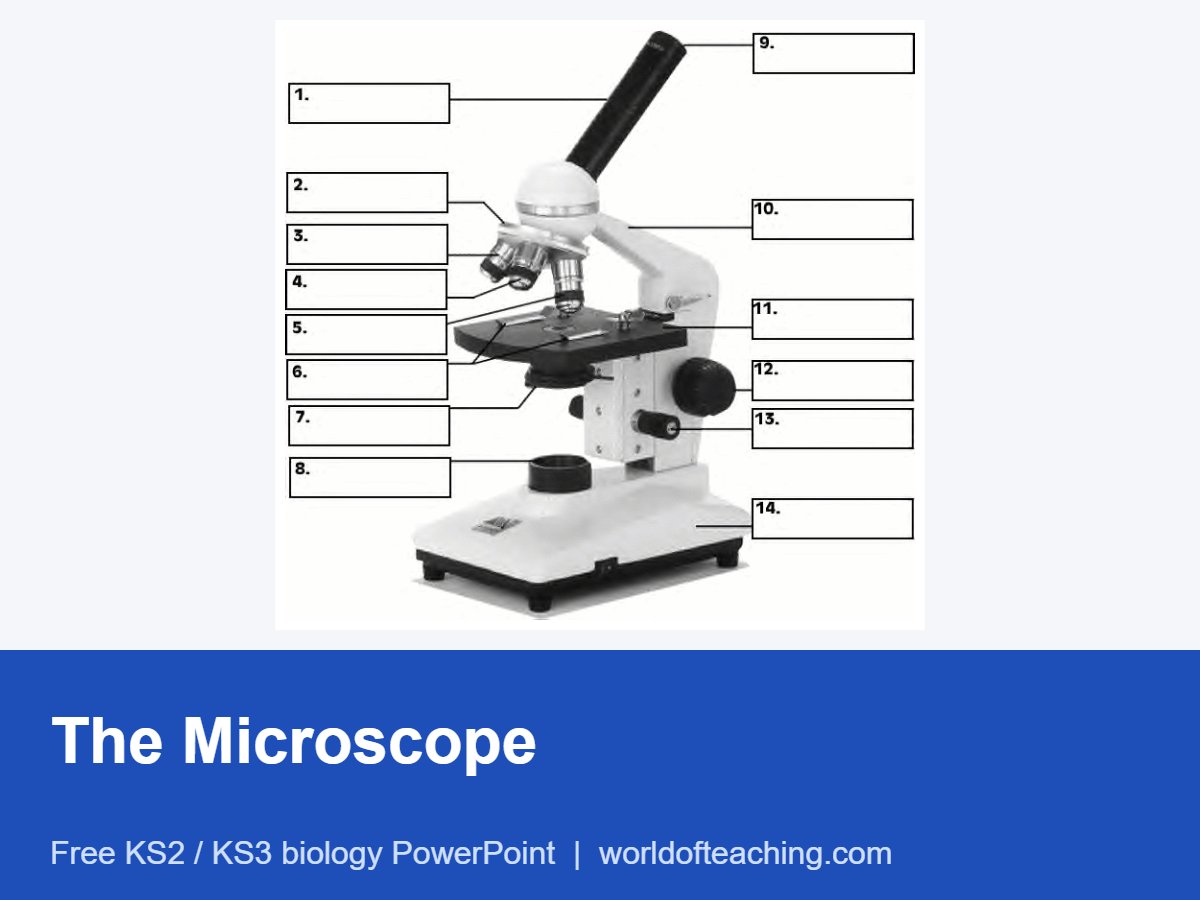
A complete beginner’s lesson on the light microscope. It starts with the history of the microscope and how convex lenses work, then takes students through every part of the microscope one slide at a time before covering magnification and how to carry, use and care for a microscope.
What this presentation covers
- the history of the microscope, from the Janssens to Leeuwenhoek
- how convex lenses magnify
- each part: eyepiece, objective lenses, nose piece, stage, clips, diaphragm, light source, arm and base
- coarse and fine focus
- calculating total magnification
- carrying, using and caring for a microscope
Level: KS2 / KS3
Slides: 27
Format: PowerPoint (.pptx)
Teaching notes
How to use it. A good first microscope lesson for KS2 and KS3. Teach the parts with a real microscope on each bench if you can, and have pupils point to each part as it comes up on the slides. Follow it with a simple practical such as looking at onion skin or a printed letter e, which also shows that the image appears upside down and back to front.
Key words
- Eyepiece lens: the lens you look through, usually magnifying ×10
- Objective lens: the lens just above the specimen; most microscopes have three of different strengths
- Stage: the flat platform the slide sits on
- Coarse and fine focus: knobs that move the stage or lens to bring the image into focus
- Total magnification: eyepiece magnification multiplied by objective magnification
Quick check questions
- What is the total magnification with a ×10 eyepiece and a ×10 objective?
- Why should you start with the lowest power objective lens?
- How should you carry a microscope?
Show answers
- ×100.
- It gives the widest view, so the specimen is easier to find, and there is less risk of the lens hitting the slide.
- With one hand on the arm and the other supporting the base.
Related lessons: Electron Microscope | Specialised Cells | Microscopy revision (premium)